
Required Tools
| Item | Count |
|---|---|
| P1 Phillips Screwdriver | 1 |
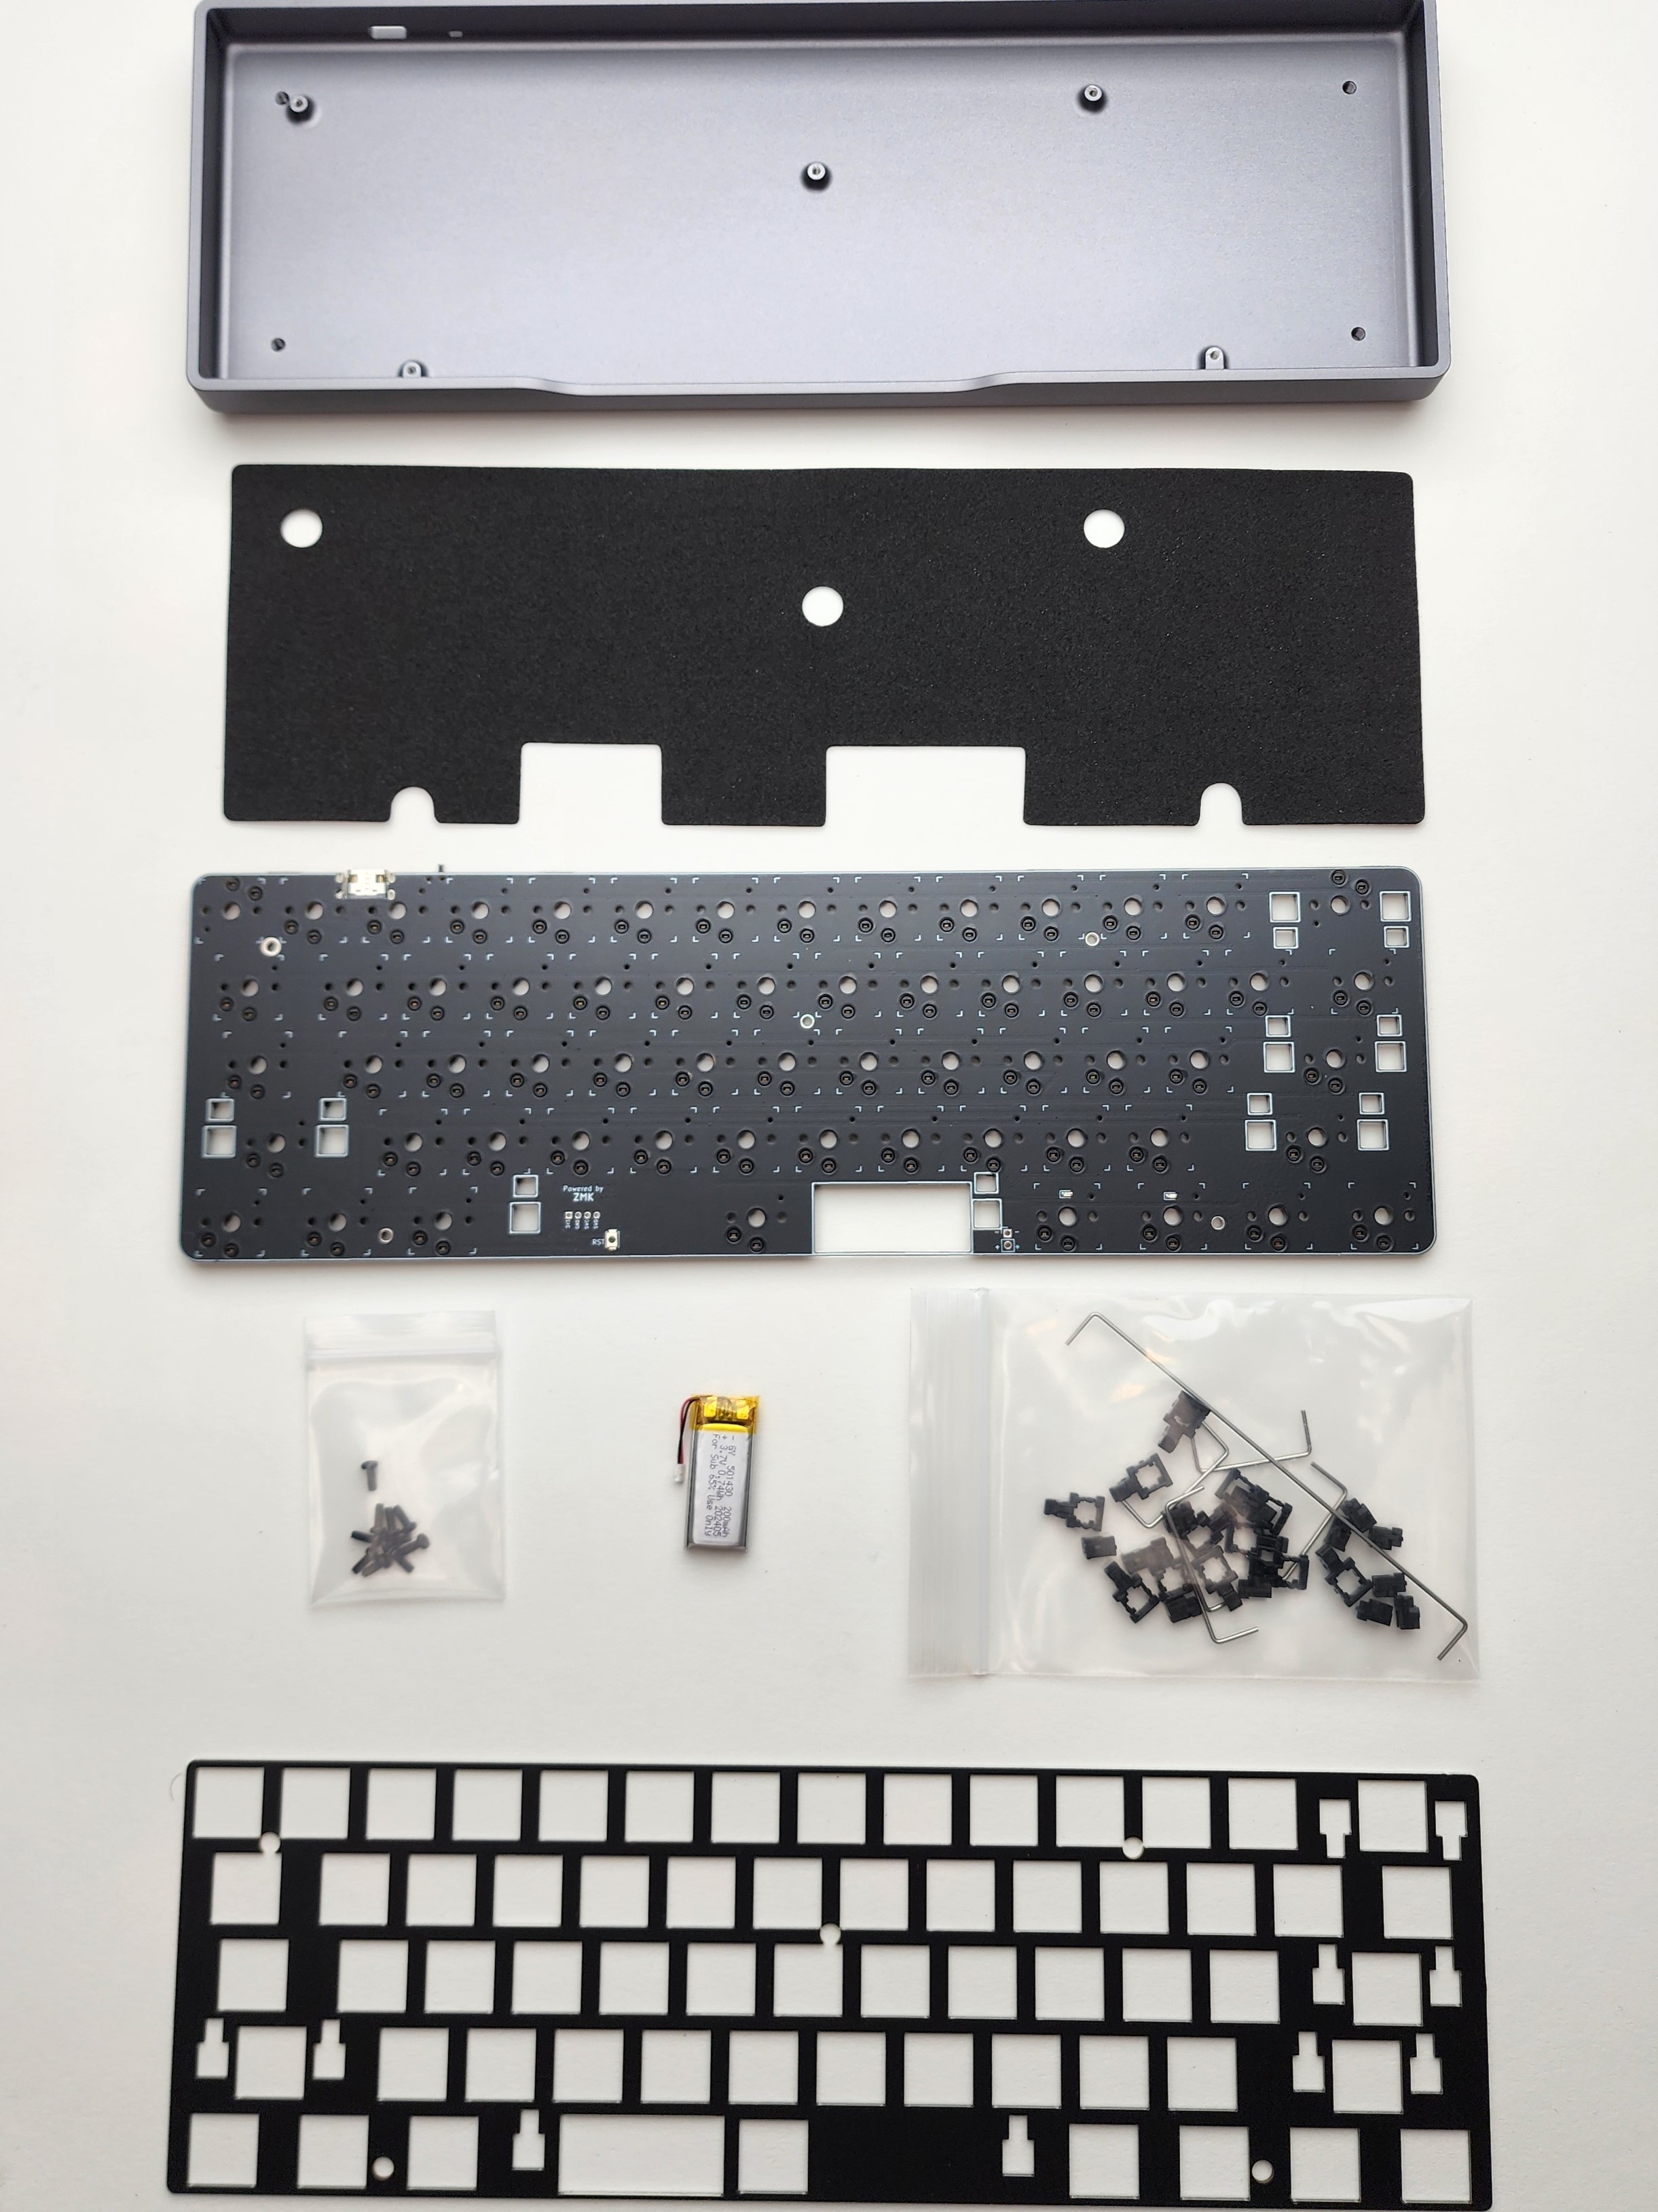
Parts
Required
| Item | Count |
|---|---|
| Rechteck Case | 1 |
| Rechteck PCB | 1 |
| Switches | 60 |
| Keycaps | 60 |
Optional
| Item | Count |
|---|---|
| Tenting Kit | 1 |
This build guide is designed to help you put together your Rechteck keyboard, it is much like many 60% keyboards but being one of the first Choc 60% keyboards there are some things to note that we will pay special attention to.
Step 1 The Stabilizers!
Choc stabilizers f***ing suck, just being real with you. If your keys are having problems when you're done 99% of the time its going to be the stabs. Please go over this section a few times and you will be able to put them together. Here is another awesome guide about choc stabs from keebio
Let's get into it.
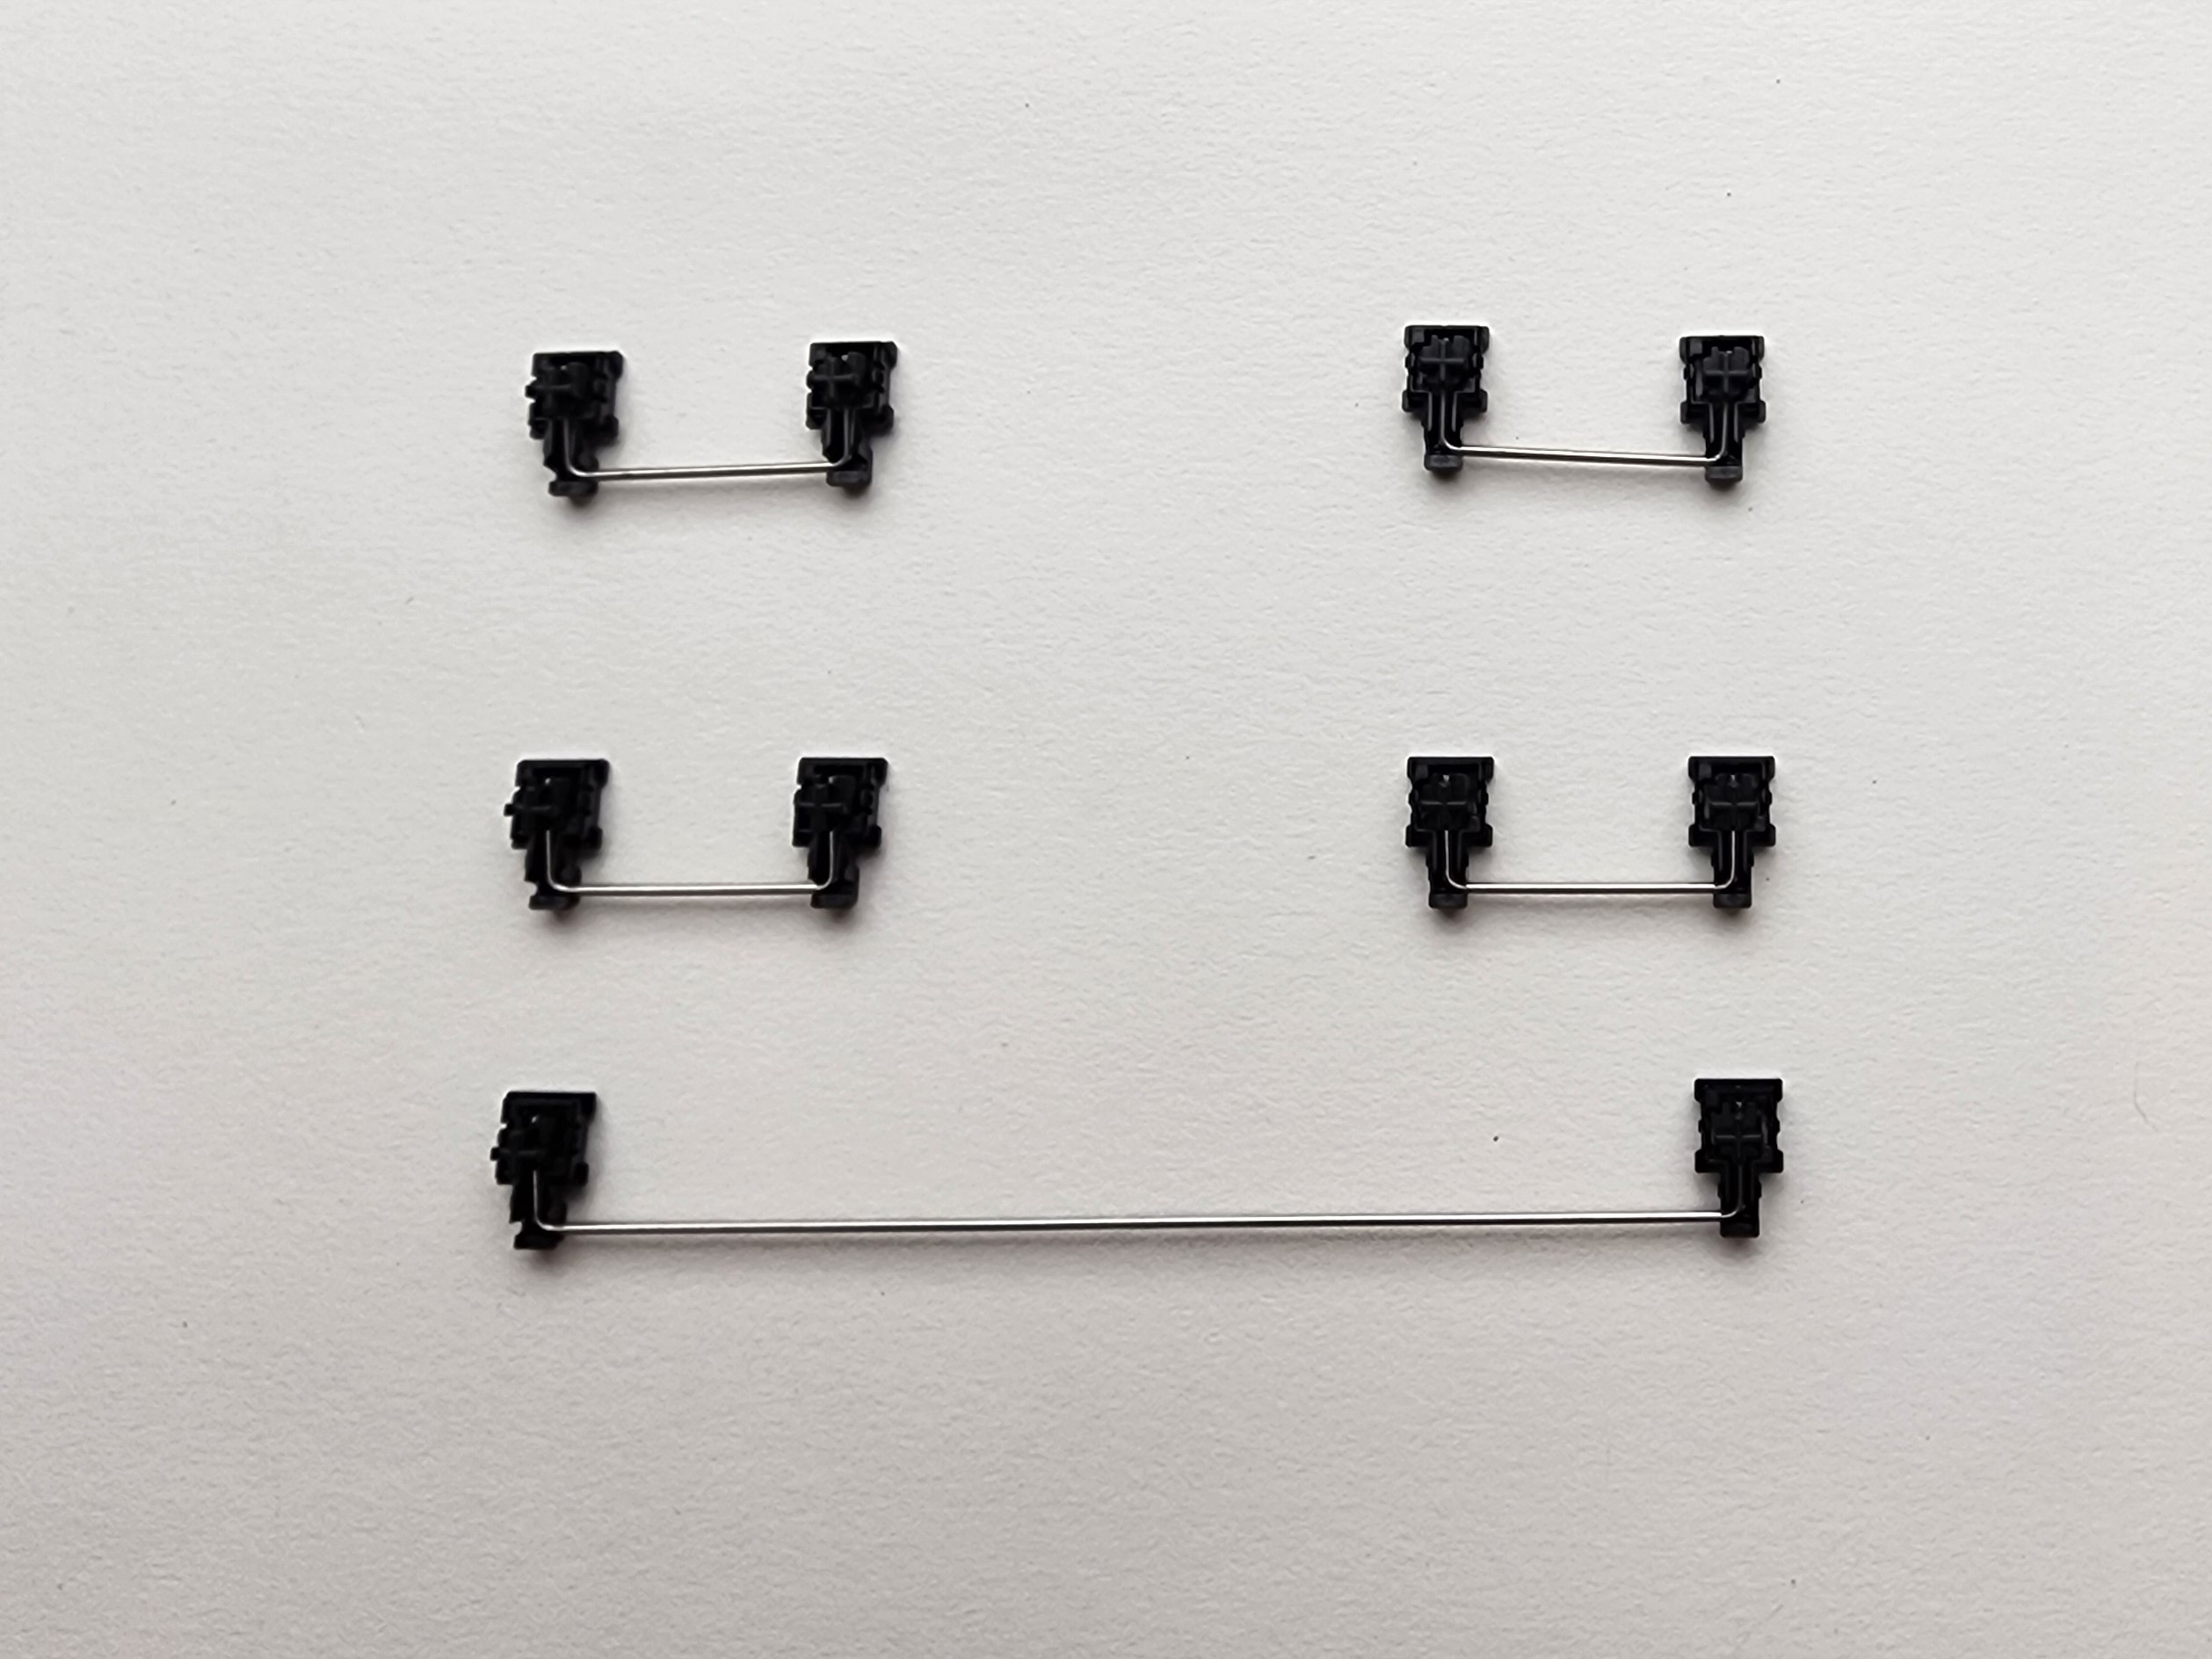
Like MX stabs, choc stabs are made up of 5 parts.
- slider x2
- housing x2
- wire x1
You need to insert the slider into the housing from the bottom (the fatter part). It is hard to push in but once you push it far enough it will click in and hold itself in place.
alignment
You need to orient your parts as seen in the photo below.
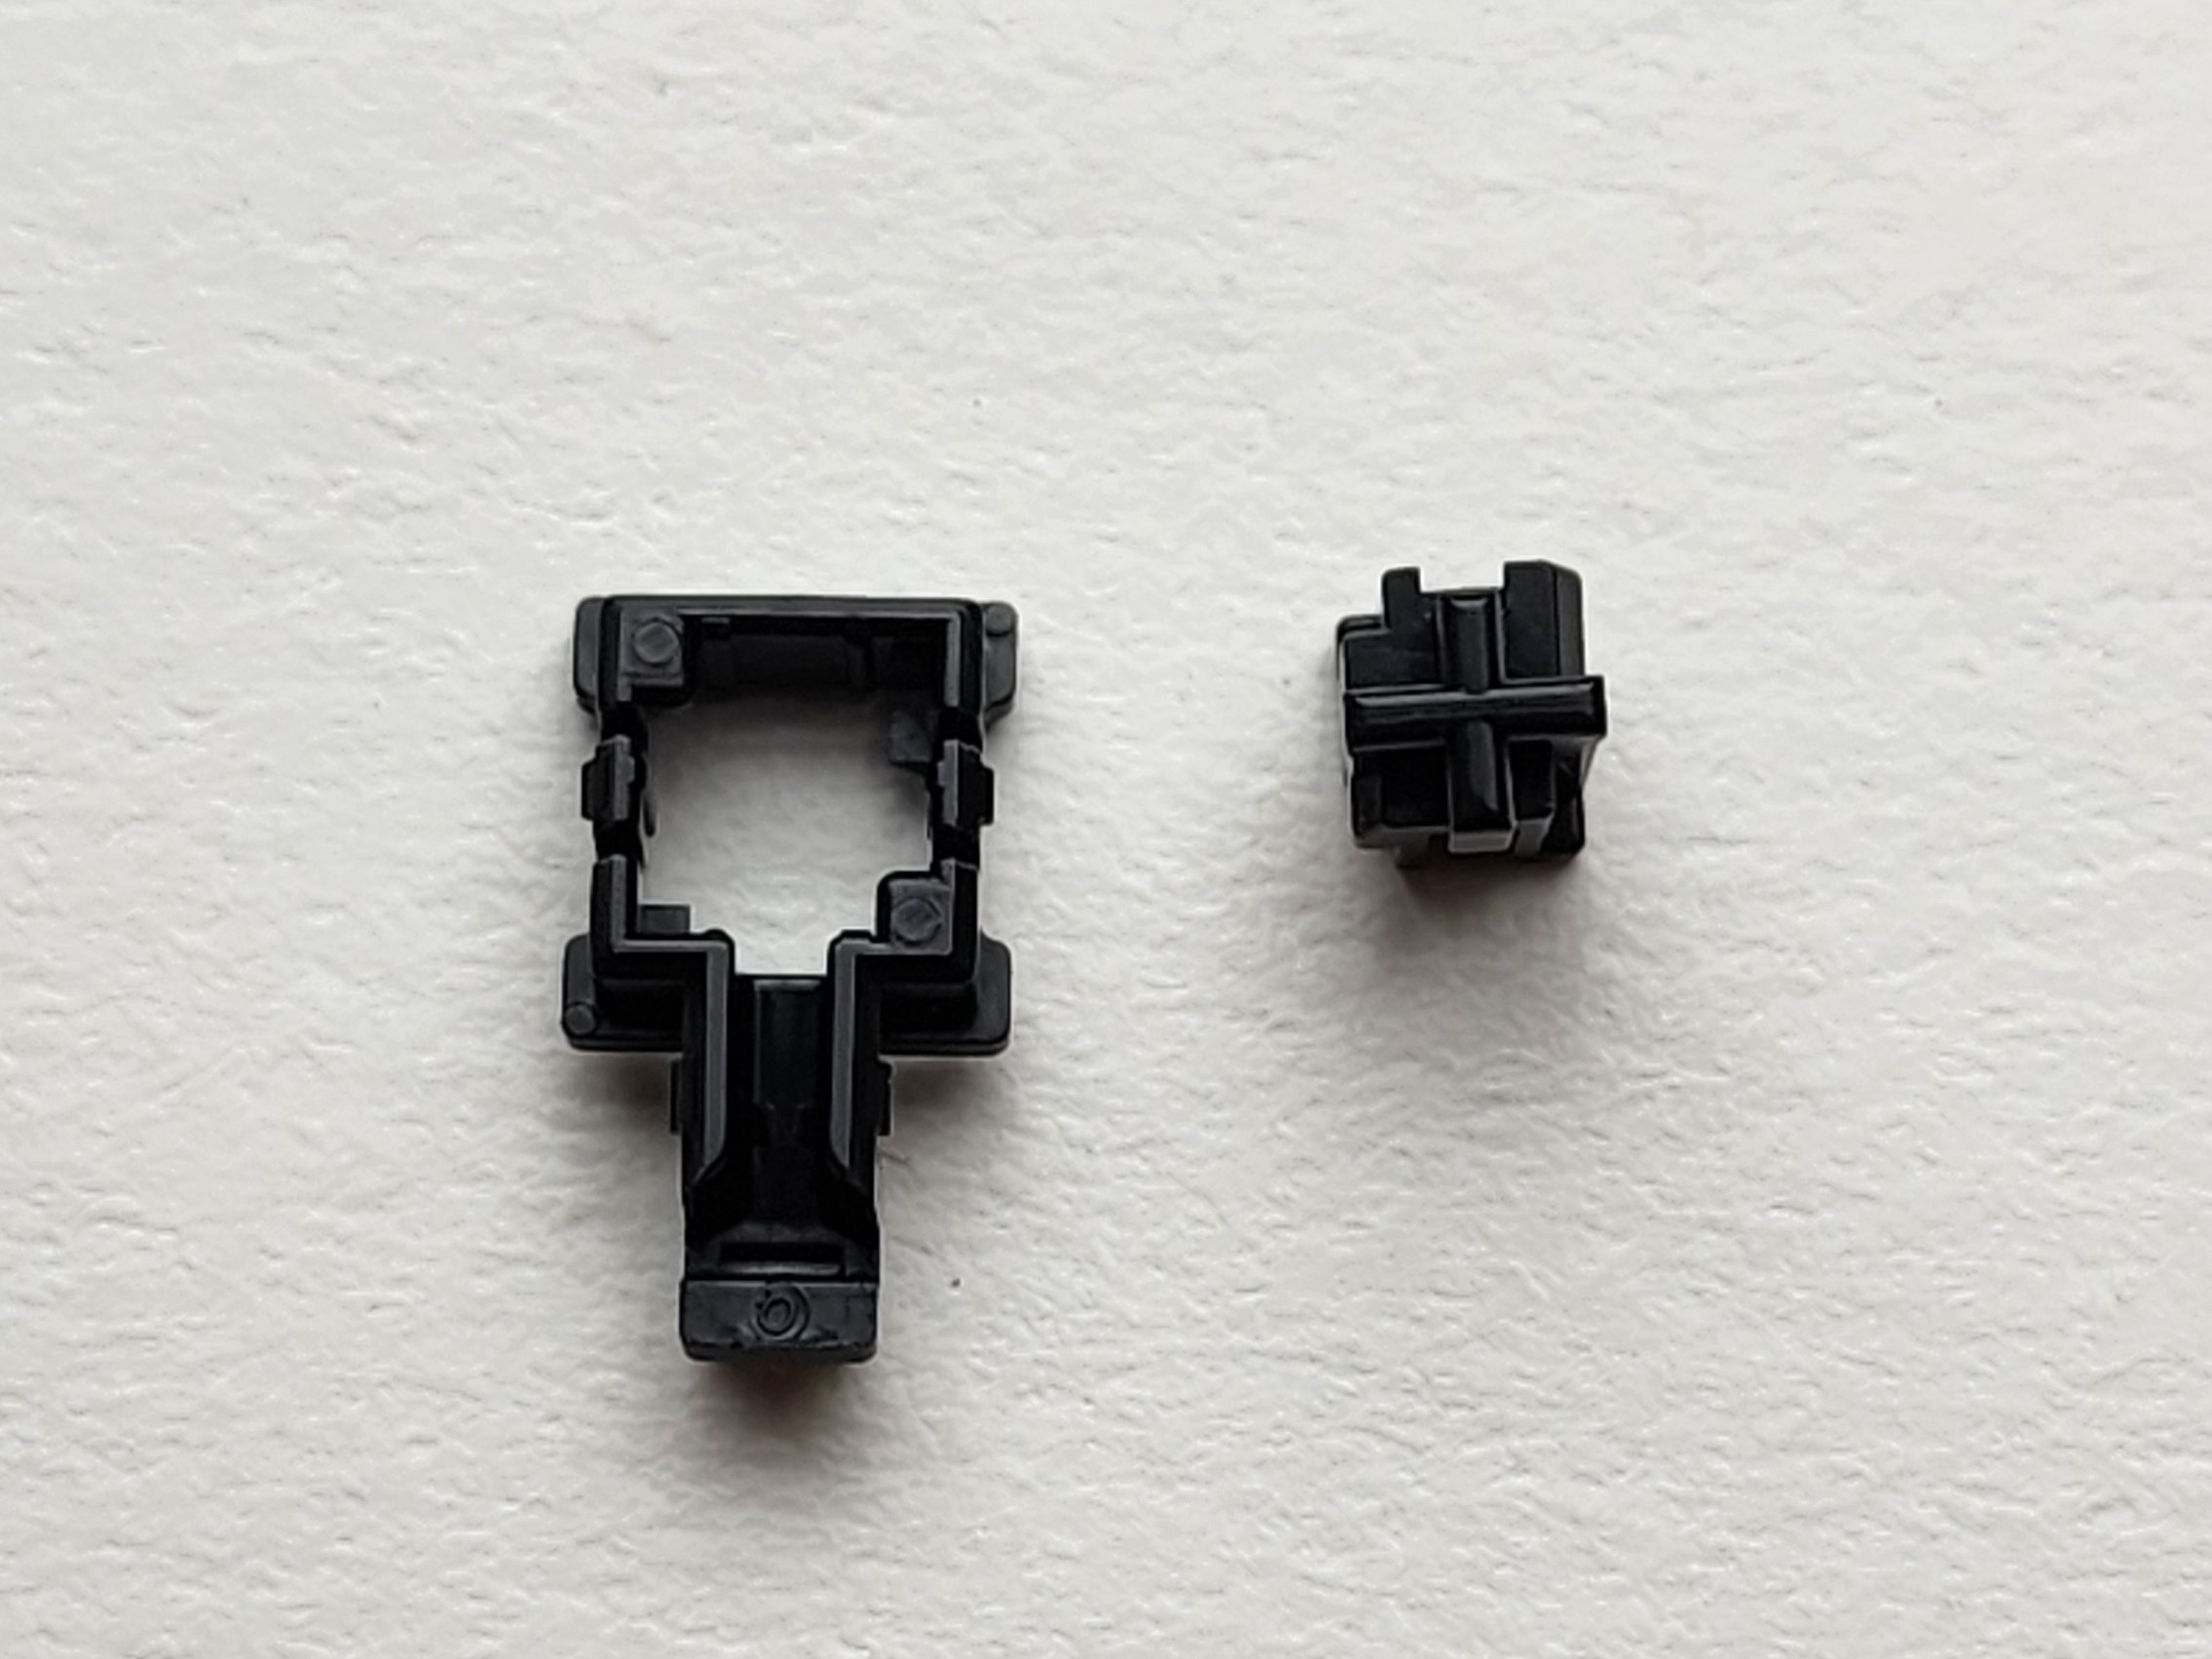
![]()
Next you need to push it in from the bottom (the part touching the desk in the picture).
And another shot to drill it home.
Great, now do it 10 times, and we will move onto installing the wires.
In the front of the housing you will see a little tray. This is where the wire will sit once its installed. The wires just go into the only hole accessible on the slider. The wires do not click in; they kinda just rest there. Below is a gif of the whole wire install into both sides.
All Done do that 5 times. 4 short 1 long
Step 2 Installing in the plate.
Aligning the stab into the plate is kinda fiddly because the wire does not stay in until its fully installed. But here is the idea, you install the stab from the back up though the plate, and they click into the plate.
It is very important you get them fully clicked in and the wires seated.
Also important you do it on the correct side. You want to install them into the the back of the plate.
Your plate will be face up if you have the space bar along the bottom and the top right corner should be a stabilizer.
Above you can see that the wire may fall out and you can just slide it into place.
Another shot from the other side.
Do this for all 5 stabilized keys and let's install the plate on the pcb.
tip: this is a good time to lube your stabs it really helps
Yep :D you just rest it on top.
Step 3 Put the Switches in!
Now that all the holes line up you can insert your switches. Make sure that you line up the metal pins on the switch with the hotswap on the PCB each switch can only go in one way to work. When inserting your switch support the back of the hotswap to insure you don't break the PCB while installing switches (which can happens if the switch is miss aligned.)
We recommend doing the stabilized keys first.
tip: when inserting the switches, ensure they're seated in the plate fully so the plate isn't compressed against the PCB. If the plate is pushed against the PCB subsequent installed switches don't seat fully and stabs can stick
Install the rest of your switches and it should look like this.
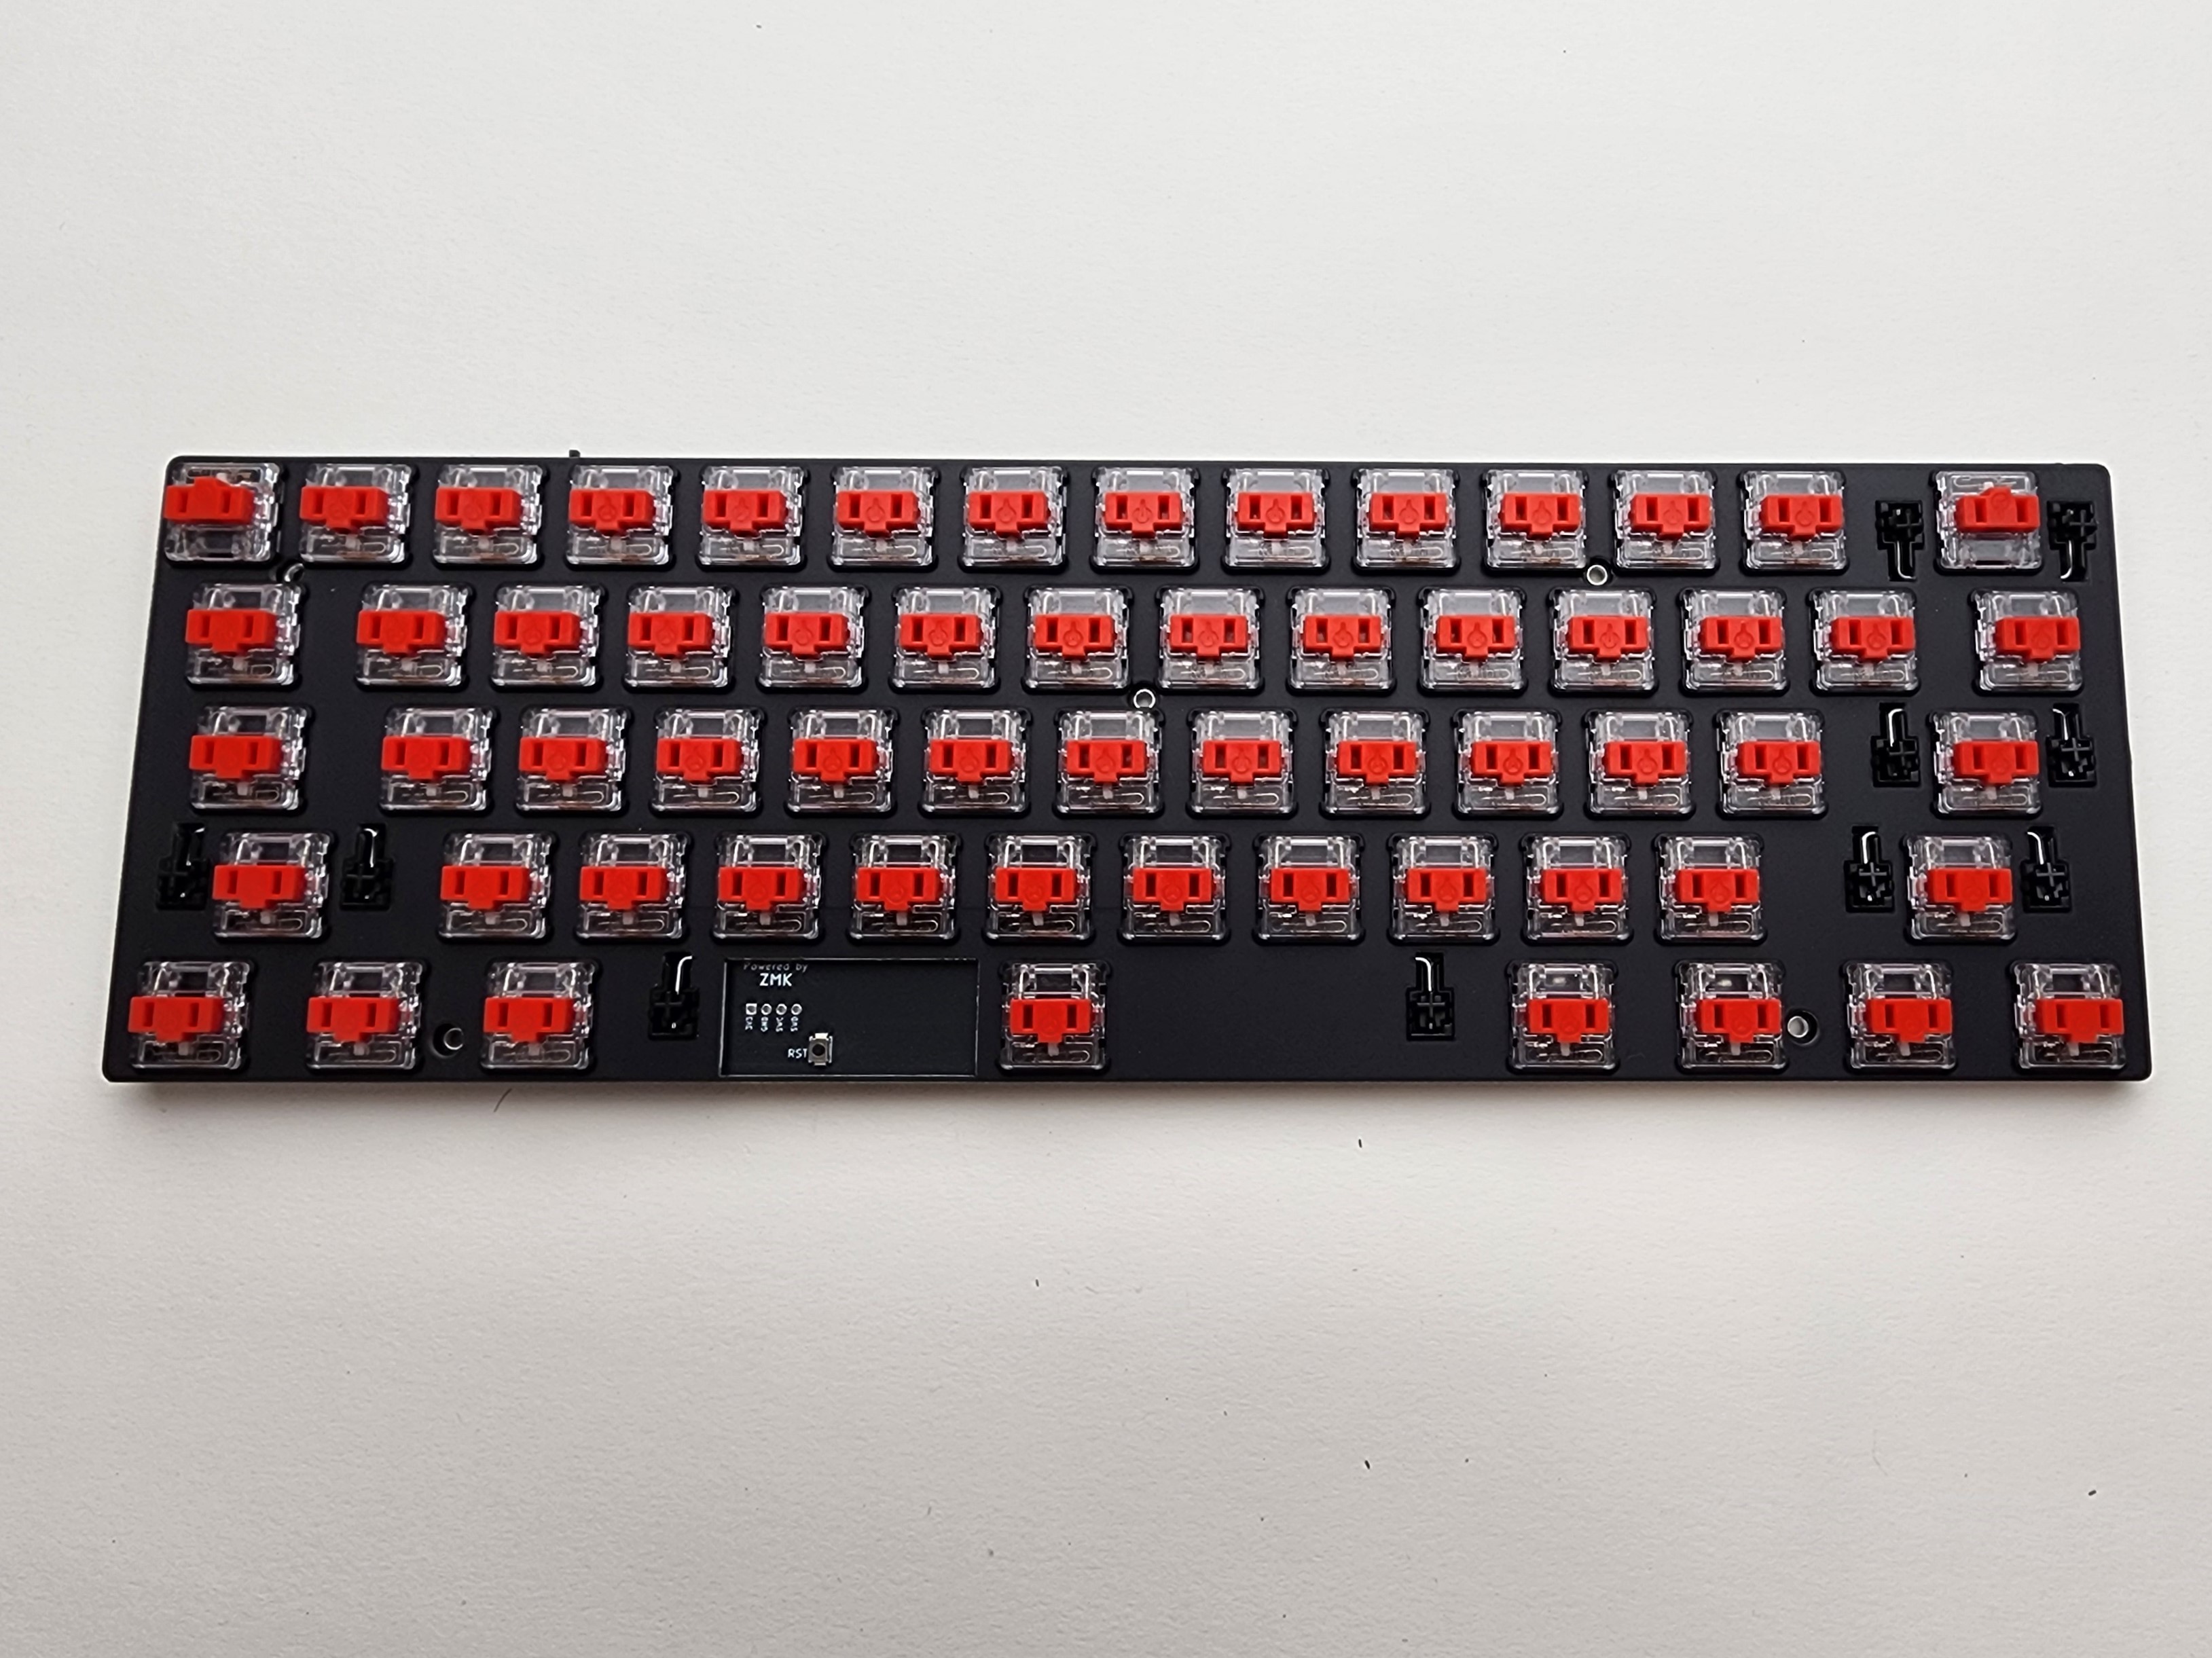
Now you can test your PCB to make sure every switch works. If they do not, pop out the switch that does not work and check for bent pins. Also, this is a good time to check and make sure each stab moves easily. They can be very easily misaligned and will cause your cap to stay pressed if they are.
Step 4 Installing The Battery.
The battery is really easy to install. We use a click in connector so just line it up and push it in.
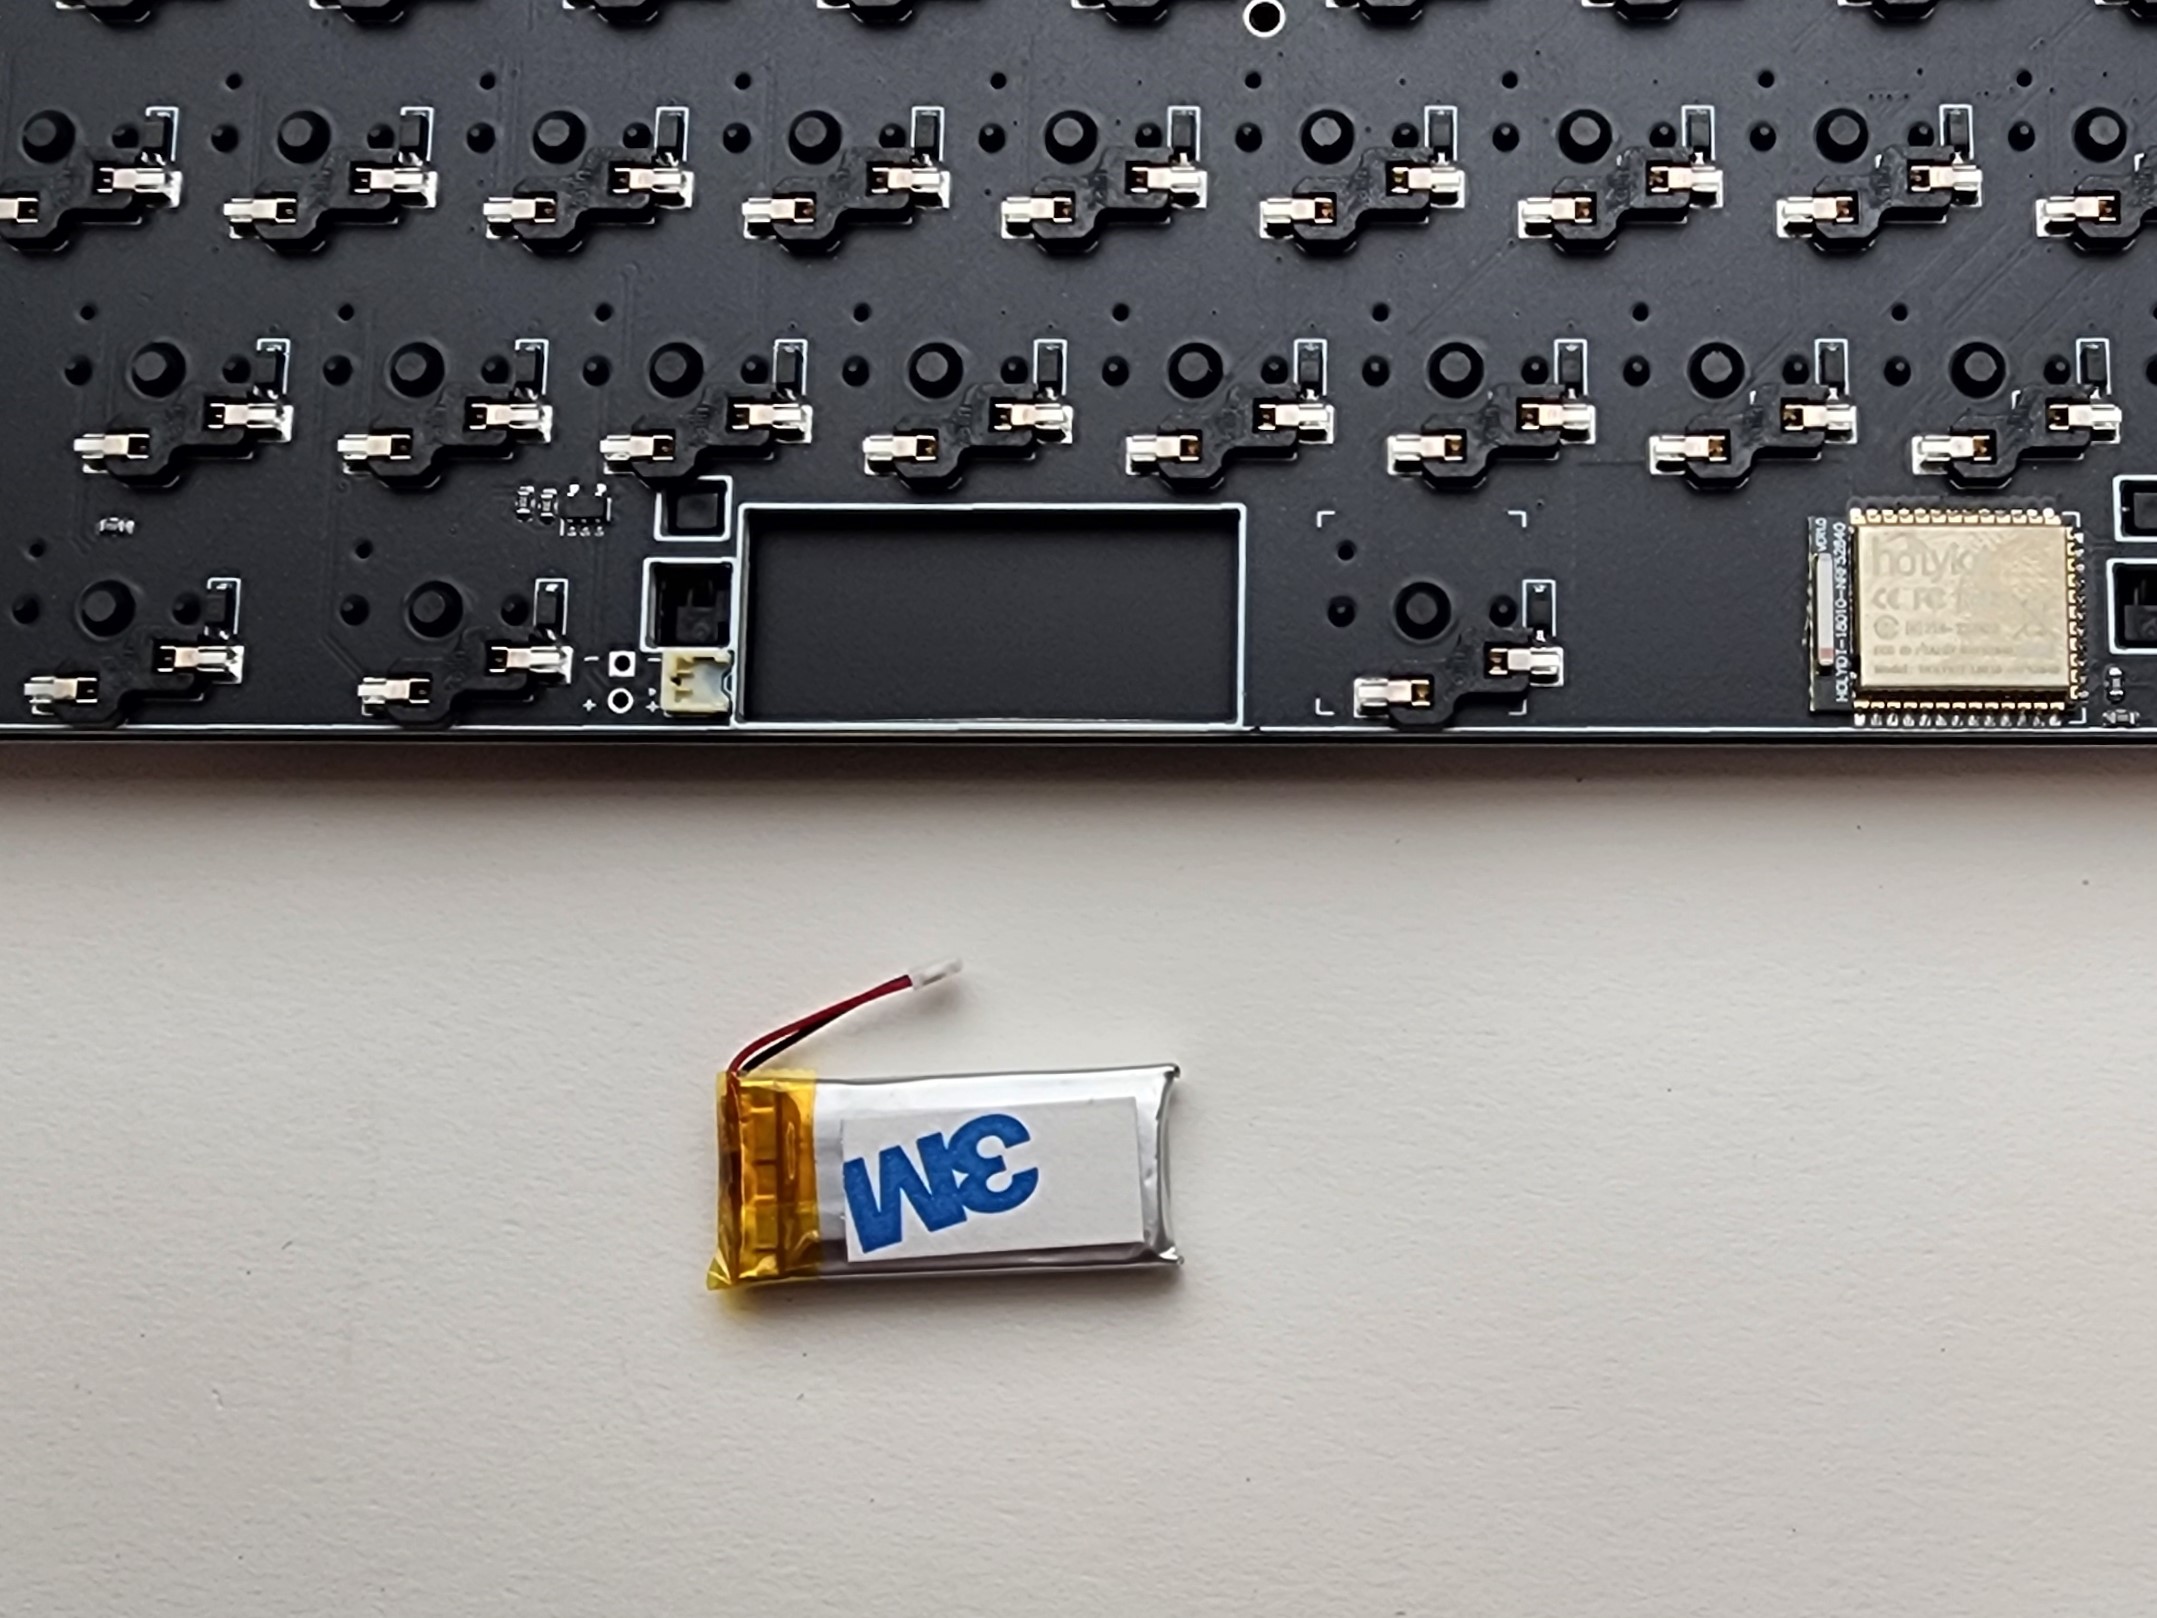
The connector can only go together one way. If its not going in, don't force it and try and flip it over.
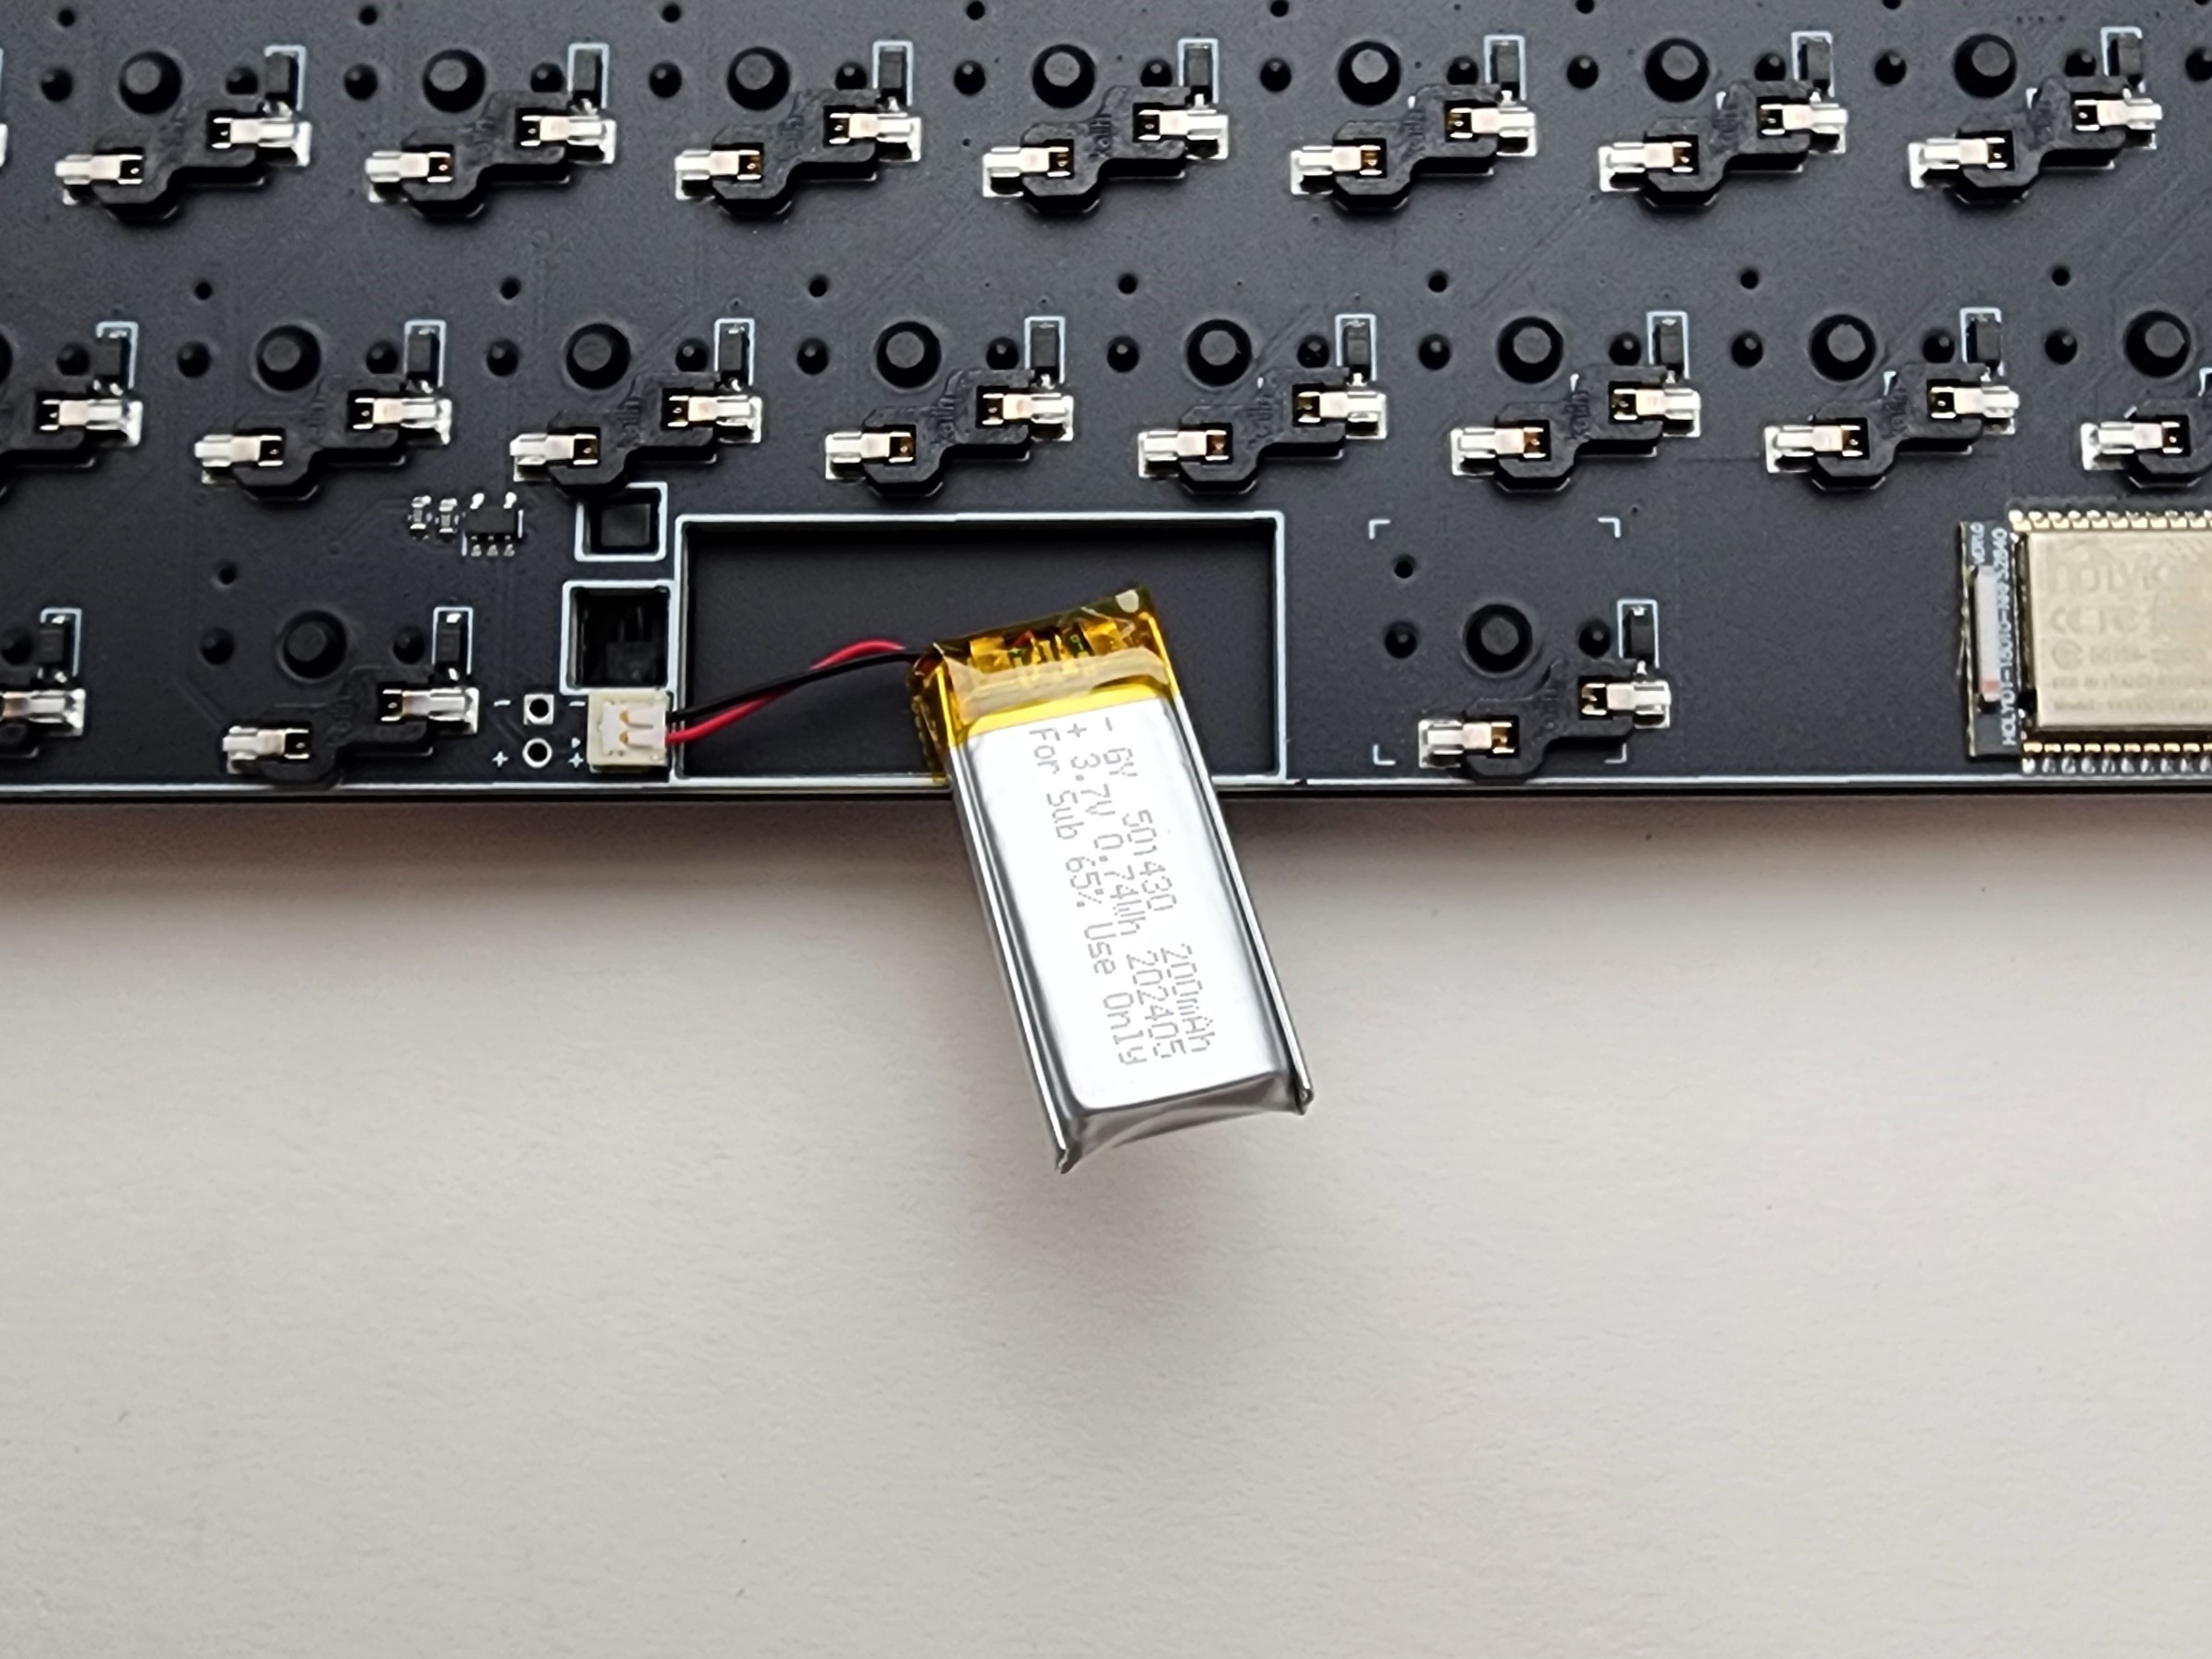
To help keep your battery in place while you finish your build there is some 3m tape on the back of your battery and you can stick that to the plate.

All done lets move on
Step 5 Getting so Close .
Make sure your case foam is lined up like the picture below
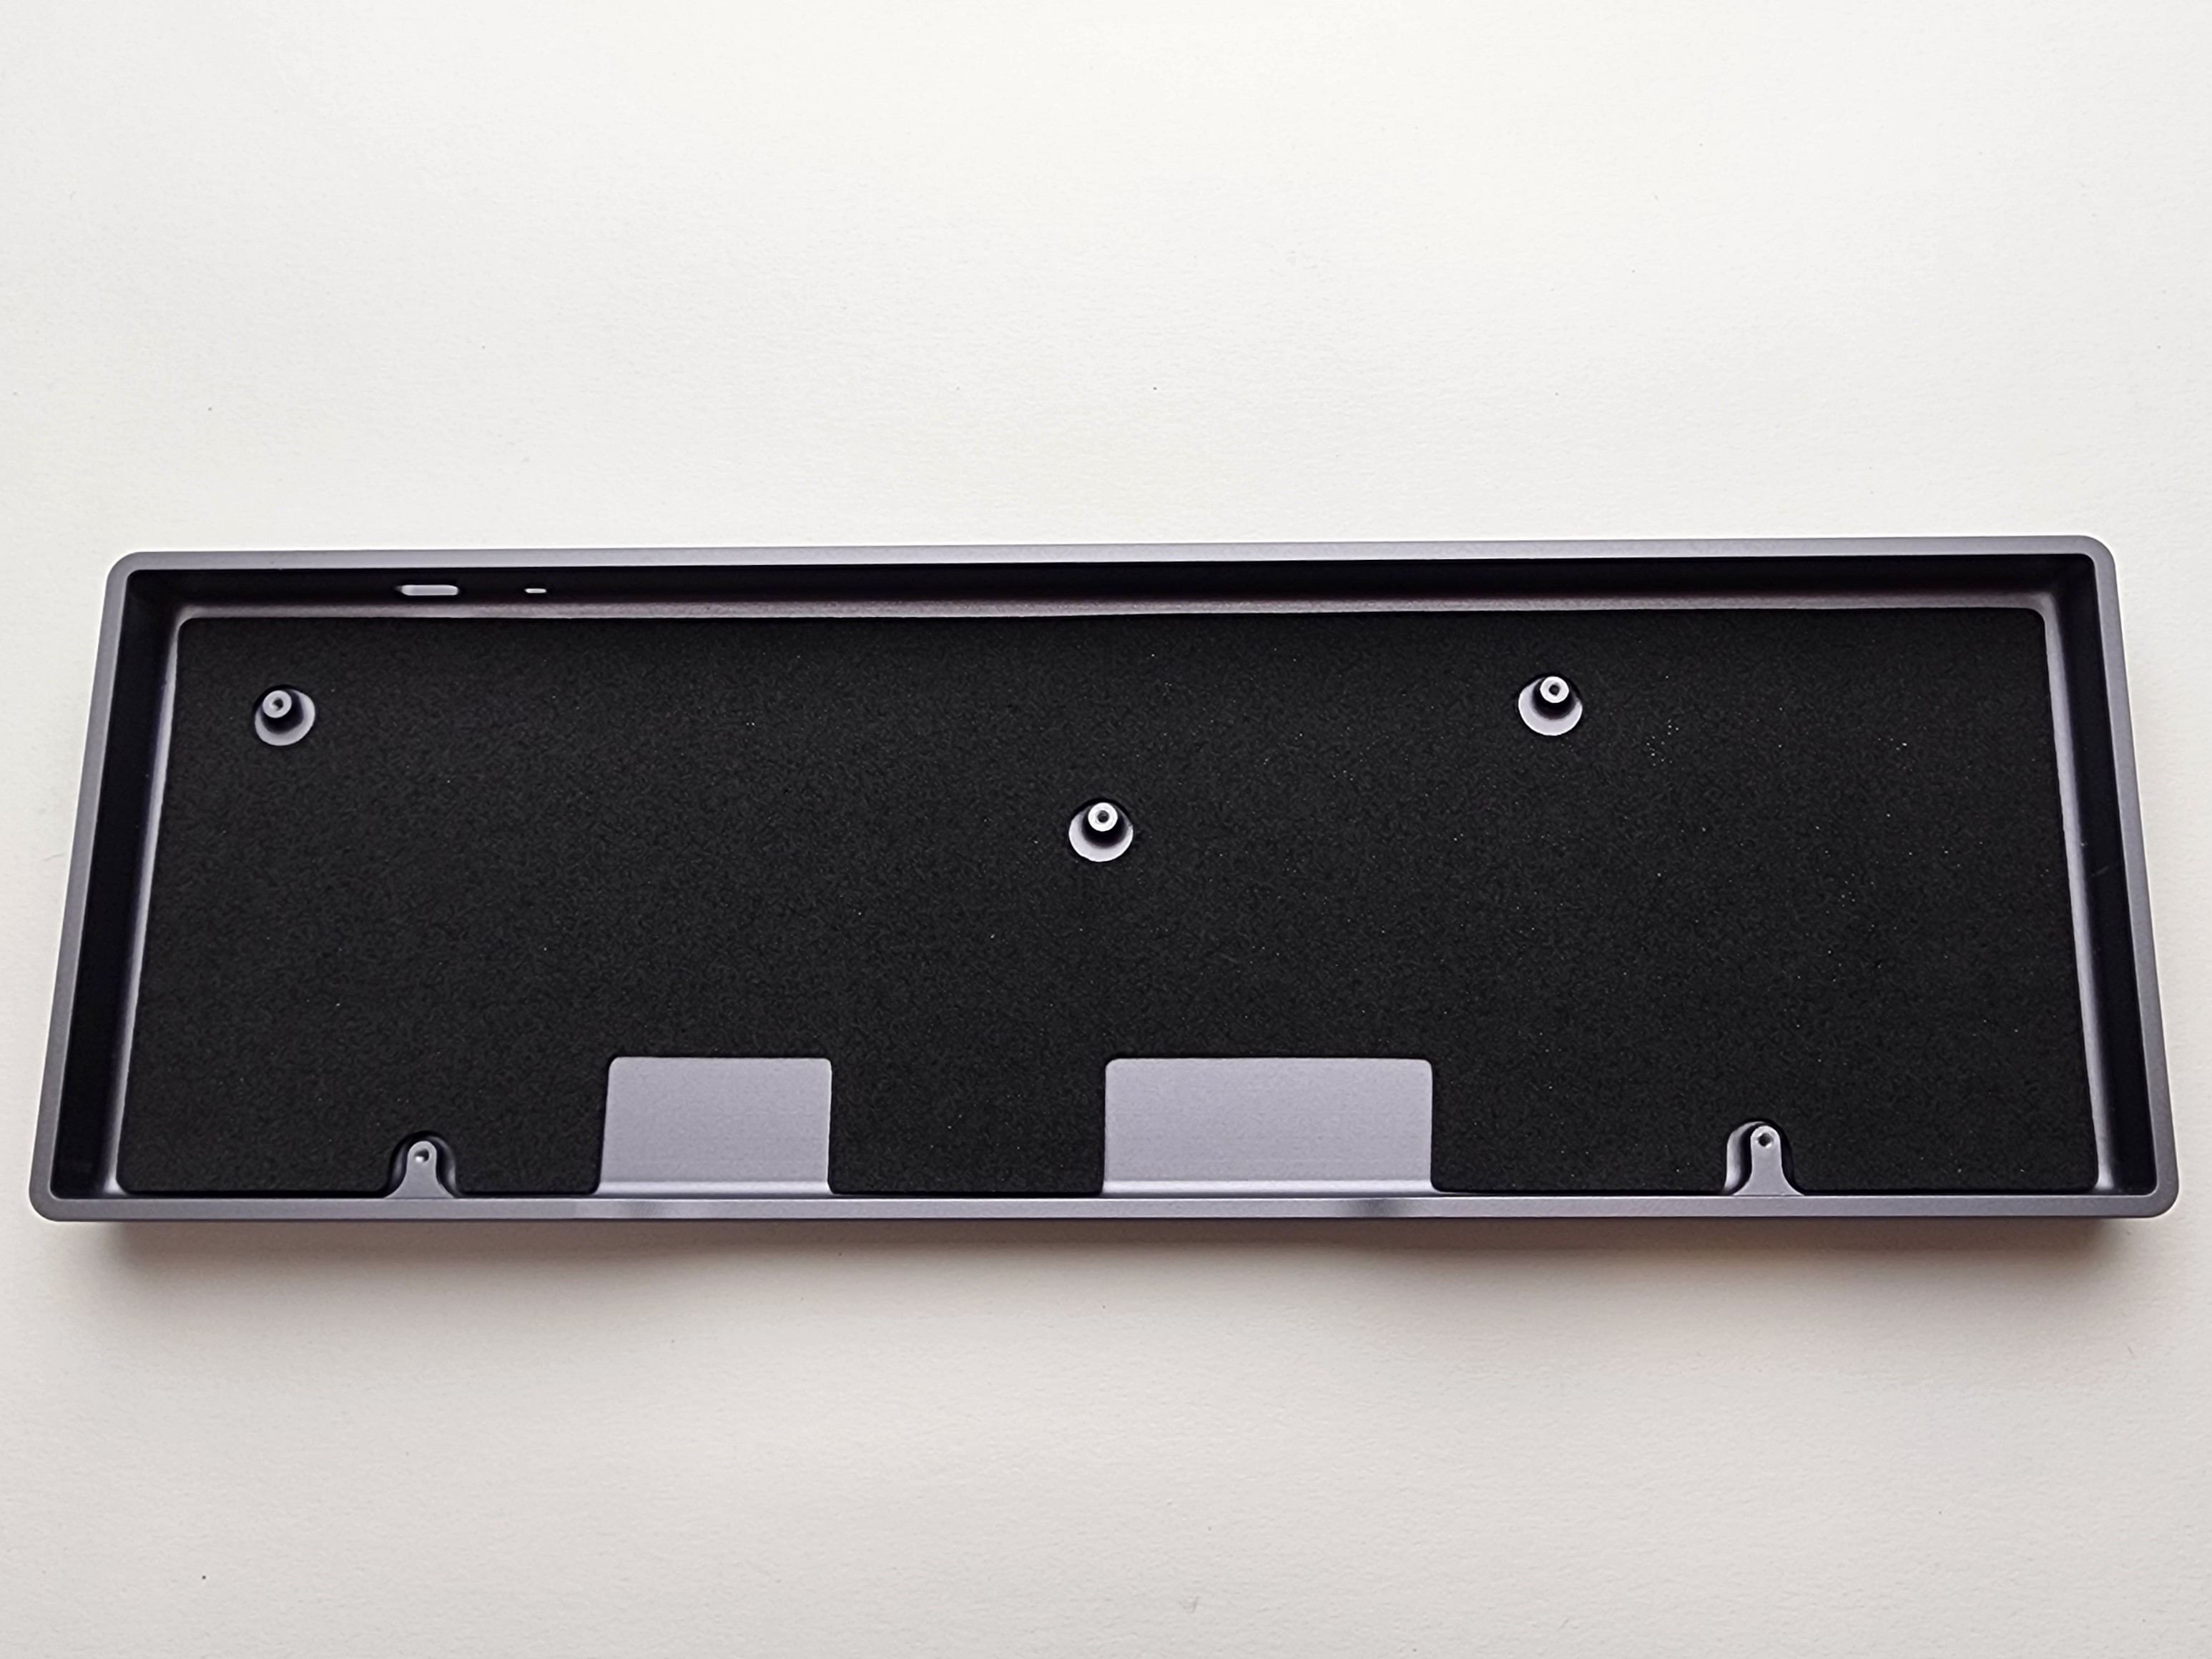
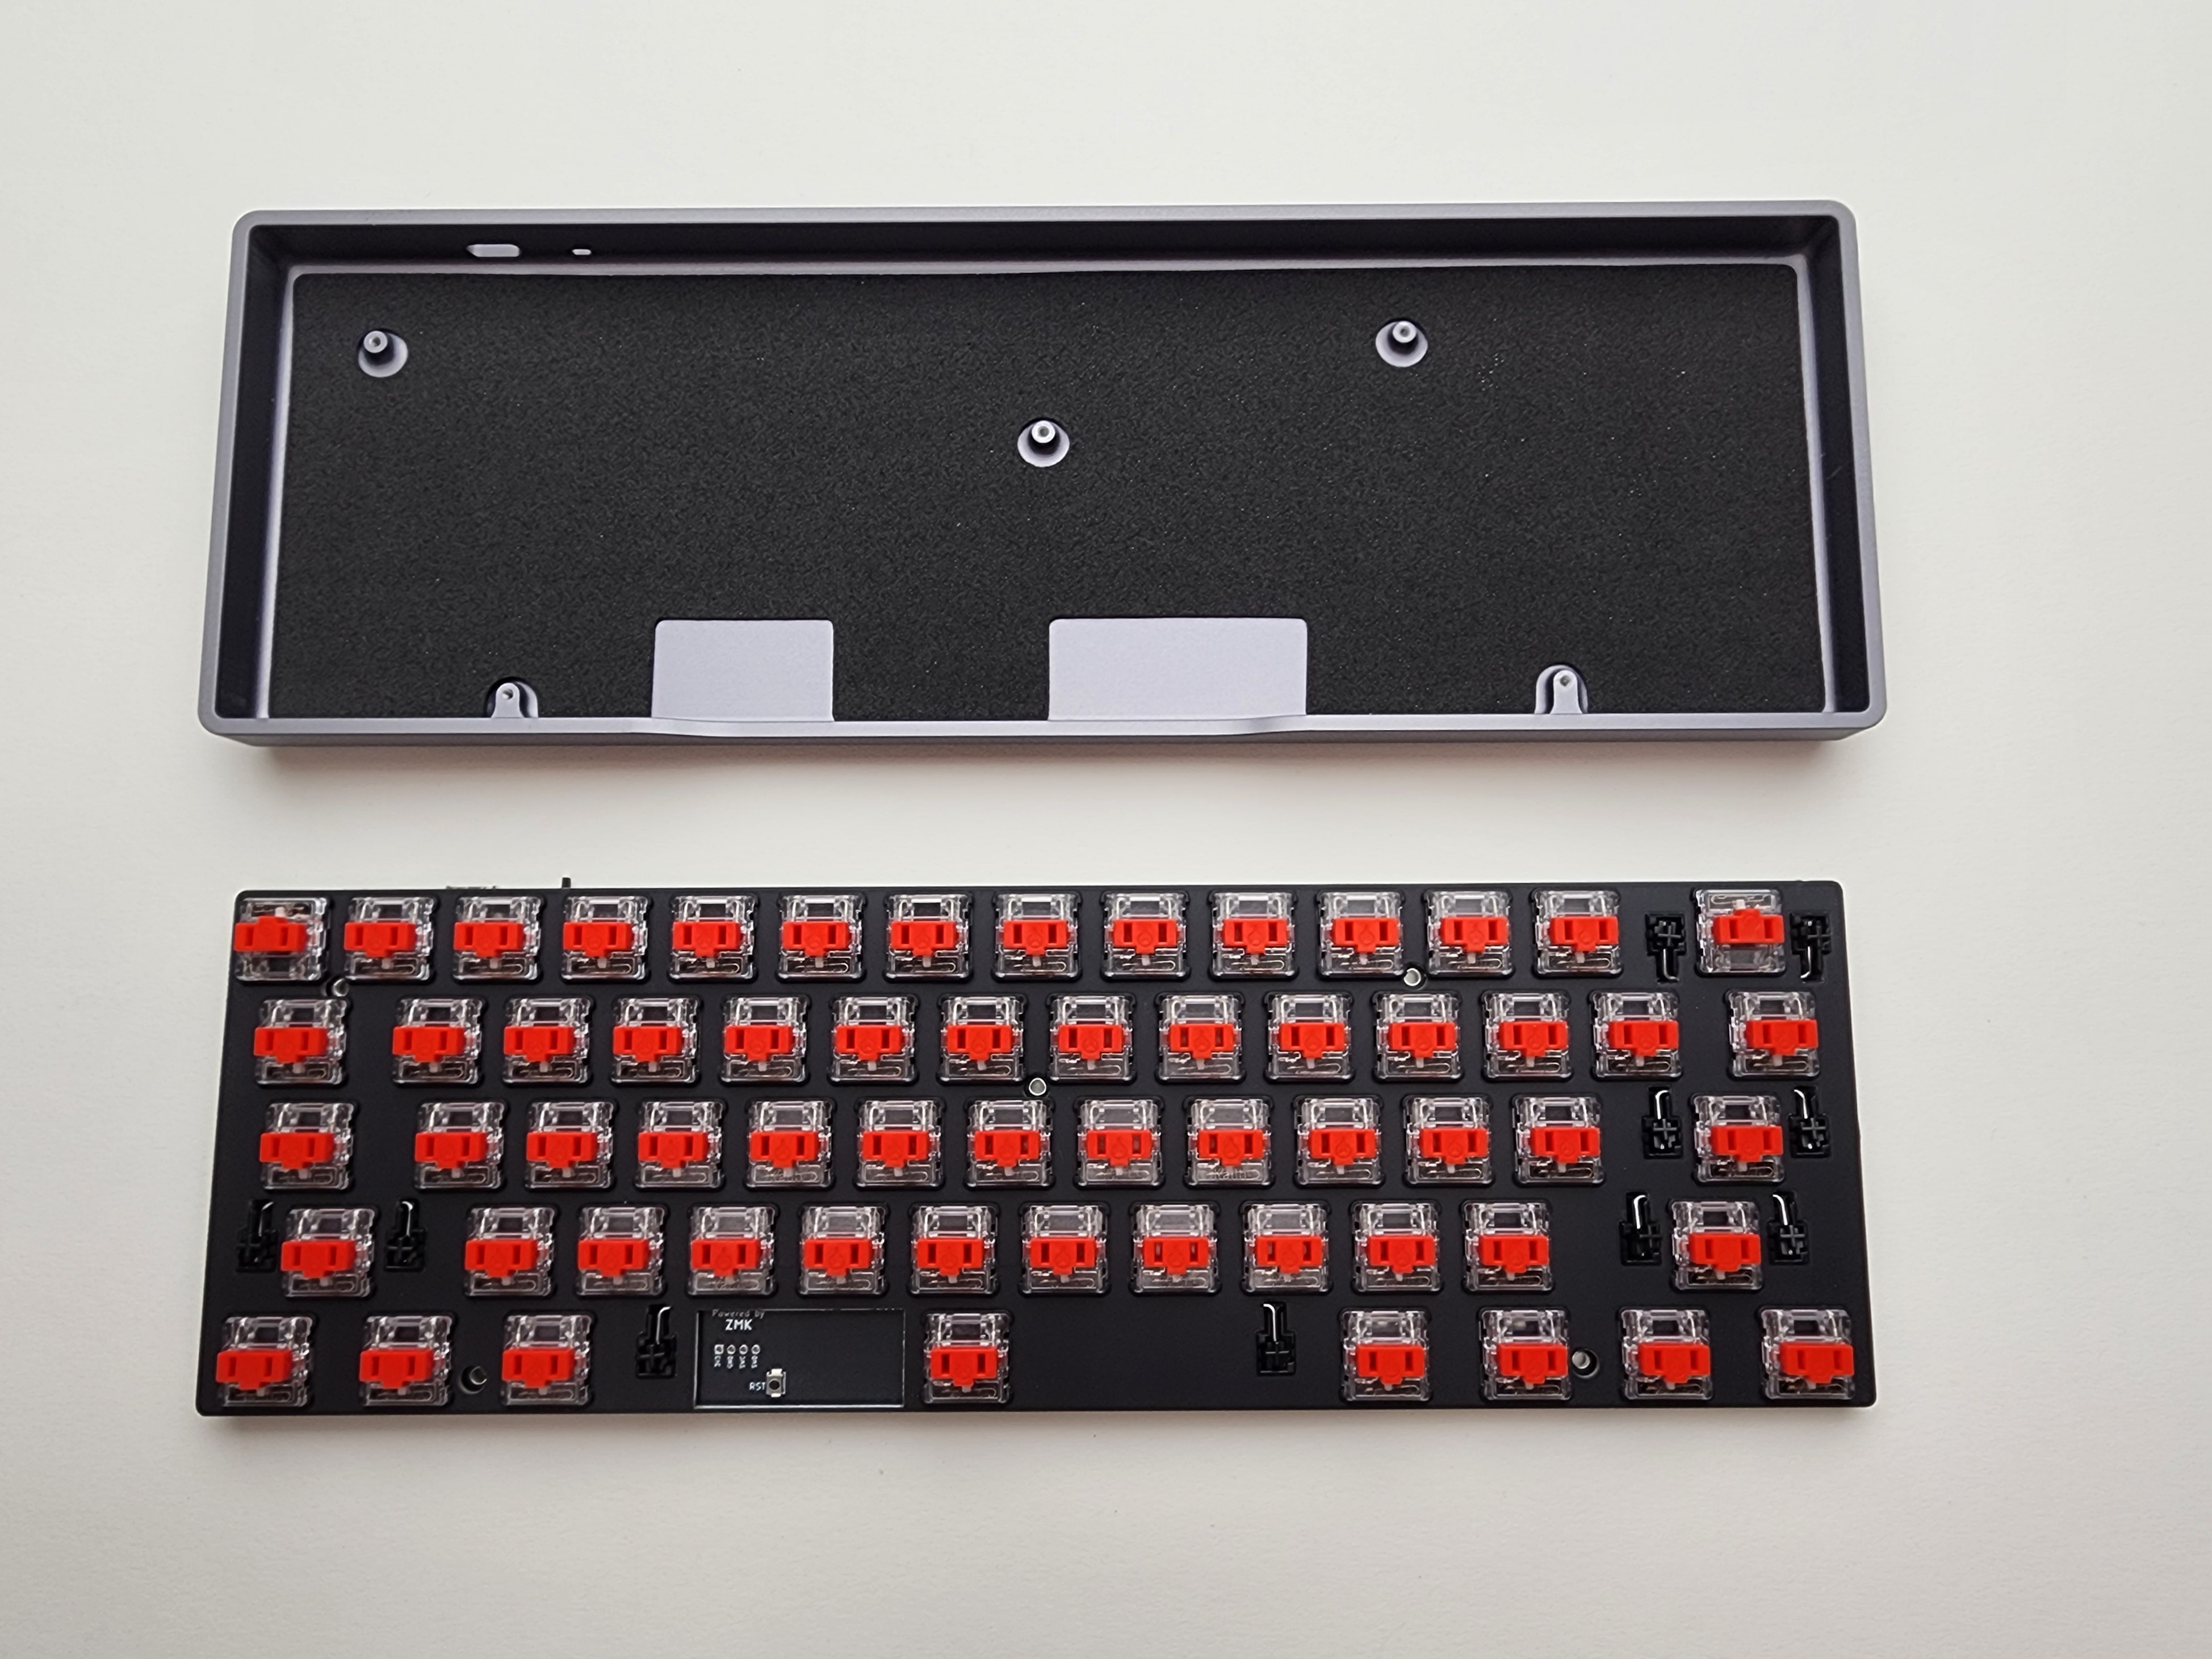
Once your foam is lined up you can drop your PCB / Plate / Switch assembly into the case. To get the clean look for the usb and power switch we intentionally made these very tight. It is very important you do not force it into place.
- First line up the power switch.
- Then the USB port.
- Then the pcb should fall into place.
Screw all 5 included screws with a screwdriver.
Step 6 Keycaps.
Throw the MBK Engage keycap set on and enjoy your new keyboard.
Note: Your reset button for re-flashing your keyboard is under your space bar.
Step 7 Tilting.
If you got tenting legs, good news, are very easy to install. You simply screw them onto the bottom of the case feet on the bottom of the case. The tenting legs have been designed to be quick to install and remove for travel.
Step 8 Enjoy.
Thank you for buying a Rechteck keyboard from Boardsource we really hope you enjoy it.
Here are some links to other articles that may help you get the most out of your new keyboard:
- Get the most out of your PCB Unleashing the High-Tech Power of Custom Keyboards
- Using the ZMK GUI
Step Bonus Programing notes.
To get the most out of your new keyboard you will want to remap your keyboard. If you are aware of ZMK and how to configure your keyboard here is a link to our config repo. If not we do recommend using this guide to use a website to remap your keyboard. In that guide we go over every step you need to reprogram your keyboard.
If nothing else and you like the default map we recommend re-flashing this default map because it is up to date.
Todo so:
- Tap the reset key (found under the space bar) twice while plugged into USB.
- Drag and drop the file downloaded above onto the new drive that has shown up on your computer.
Extra
For questions, ask in Boardsource Discord server